Recycle bin and modification history
Thanks to the modification history, changes can be quickly and clearly tracked as well as undone. In addition, a recycle bin module is available, with which deleted elements can be restored.
Contents
Recycle bin
Deletion in easyWeb standard is not final - deleted elements can be accessed via the recycle bin. This contains the function to restore elements. Elements in the recycle bin are not visible in the frontend.
To access the elements in the recycle bin, please proceed as follows:
- Select the Recycle bin module in the module overview.
- In the tree structure, select the subpage on which the item was deleted. If you have not selected a subpage or a page from which nothing has been deleted yet, the Trash display will remain empty. You can also click on the root entry (Pages) of your website. Then all deleted elements from all pages will be displayed.
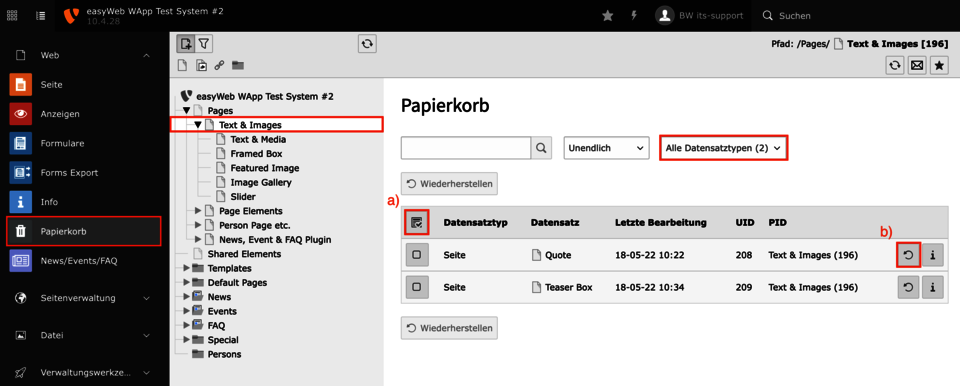
With the selection a) all elements visible on the list can be selected. Below, individual elements can be selected and then restored. With the selection b) individual elements can be restored directly.
Recover deleted content
In the list of deleted elements you can see their record type as well as the deletion date. The sorting is fixed in the first level according to the record type and then according to the date (Last edit, oldest first).
If the displayed information is not enough for you, you can have additional information displayed (see image 1 and 2).
Clicking on the Restore button (image 1) removes the element from the recycle bin and restores it.
Attention: Individual elements can also contain sub-elements.
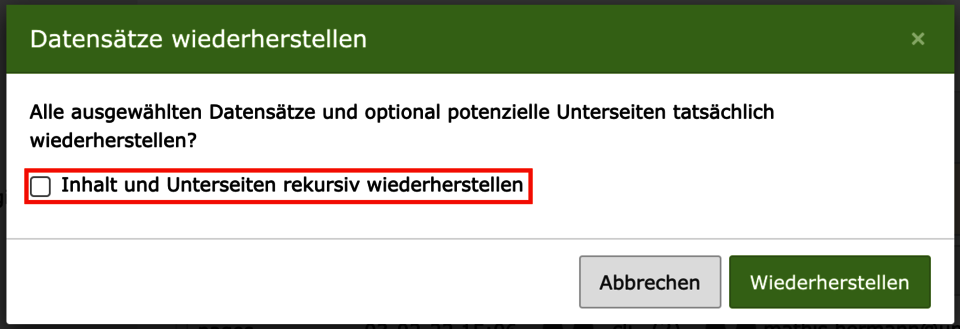
A deleted structure element may have contained a page and this in turn may have contained text or an image. In order for everything to be restored, a check mark must be set for Recursive (see image 3).
If you want to restore several elements, select the corresponding ones. If you want to restore all elements, click on the Select All icon at the top left of the table. Then you can click Restore below the table. Now you have restored the selected elements.
After restoring, the elements get their last configuration. A page that was visible before the deletion will be visible after the restore.
When restoring a subpage of another deleted page, both pages are automatically restored.
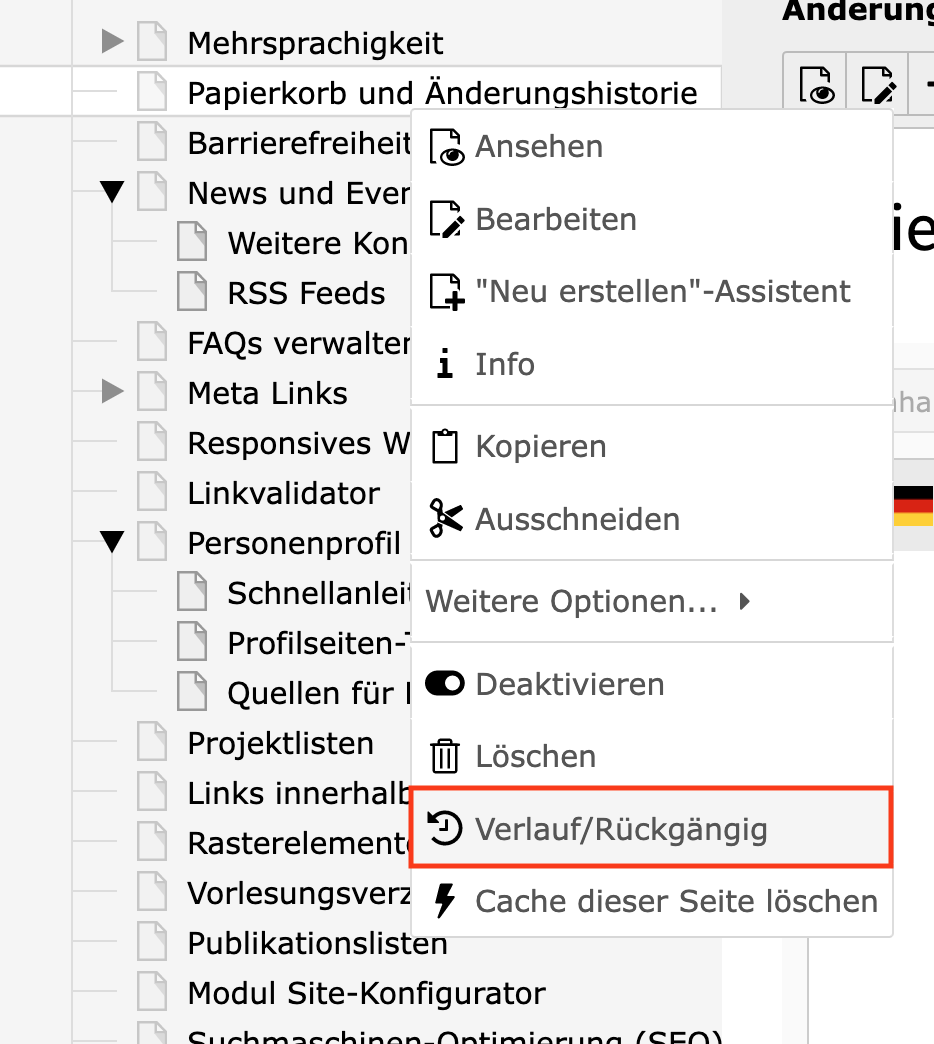
Now all modifications that have been made to this page are displayed in chronological order. With the filters at the beginning of the listing you can change the listed elements and their display.
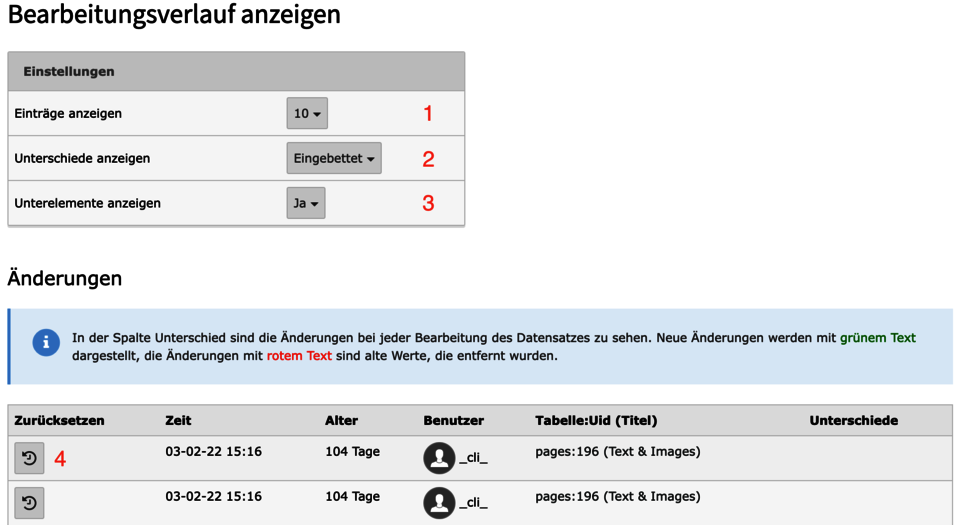
In the following explanations are given to the markers of the pictures on the right:
- Here you can select whether all or only the last 10, 20 etc. modifications should be displayed.
- Select here how the modifications are to be displayed.
- Should sub-elements of the modifications be displayed?
- Should inserted or deleted elements be displayed?
- By clicking on the rollback icon, you will first be shown a preview of the modifications.
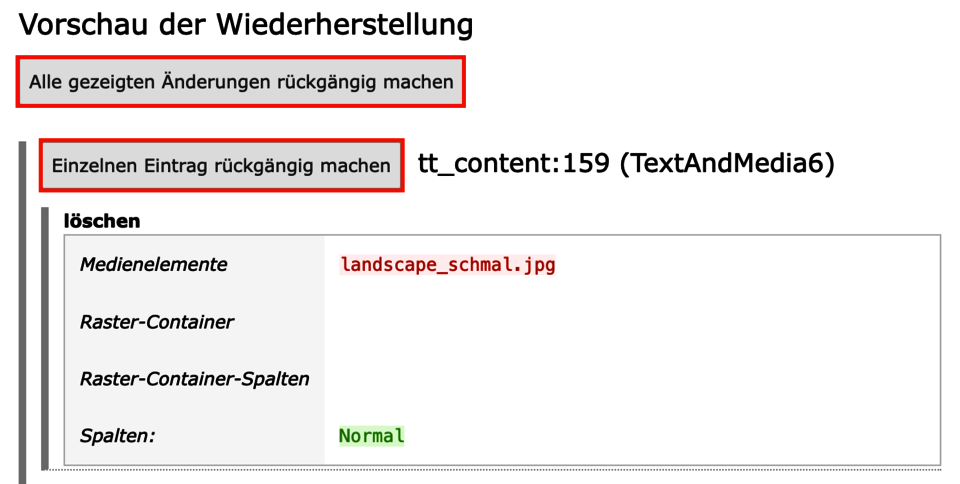
When selecting an element, you will first be shown a preview of all actions to be executed. You can then decide whether you want to execute all actions/changes, a single entry in the list or even just a single field.
With a click on the corresponding button, the action will then be executed.

