Enable and authorize users
This guide describes how to enable users and grant appropriate permissions. Thus, these instructions are not relevant for users who are not Site Admins.
Permissions are granted by adding users to different groups. Each group has different capabilities to create, modify and delete content in the backend. Basically, each group has only one specific set of permissions.
To manage the instance, there is a group called Site-Admin, which has all the capabilities of all groups. In addition, users in this group can perform administrative actions.
First login
Before users can be activated and added to groups, they must have logged in to the instance for the first time.
To do this, the person must log in to the backend. The login page is located at: yourwebsite.unibas.ch/typo3.
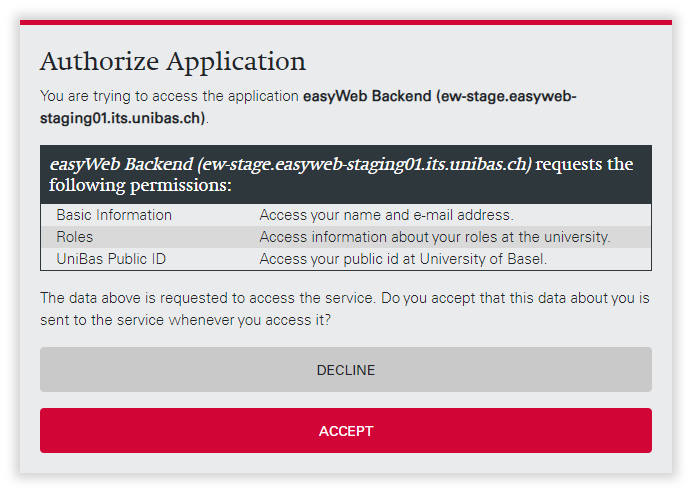
The new user will be prompted to log in with AAI as usual. After a data request from AAI for the service OAuth, the user is taken to another page. On this page, the user is asked to agree to access this AAI data for the website (authorization request - see image). If the user accepts this (Accept), the first login is executed and the user is registered.
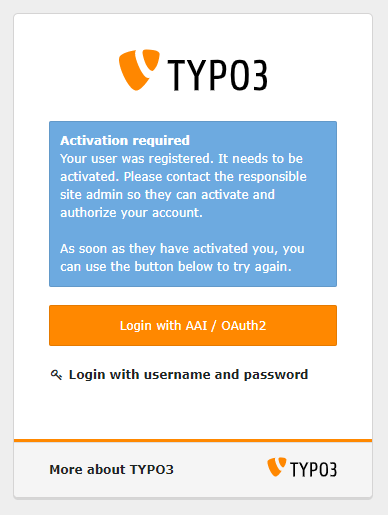
After a successful registration the question appears whether the user has already been activated. At this point the user should inform you (Site Admin) about his registration so that you can enable and authorize him. After that, the user can close the browser for the time being.
Up to this point, the user still has no access to the backend. You can now enable the user in the next step.
The login normally consists of these three steps only the first time. After that, the two steps (Data Request for AAI and Authorization Request for the website) are skipped. Unless the user has chosen a different option when confirming the data for AAI or the user logs in to a different (new) website, then the corresponding steps appear again. Otherwise, only the AAI login is required after the first login.
User Admin
Changes to user profiles are all made in the User Admin module. When you open it, you will see a list of all users that you can edit.
Above the list there is a search filter. This allows you to filter users by different attributes.
For users who have logged in for the first time, "Never" is displayed in the Last login column. If a user is deactivated, you can see that a red sign is displayed to the left of the name, next to the avatar icon.
Enable user
Click the unhide button next to the edit button for the corresponding user. Now the user is enabled and can see the TYPO3 backend.
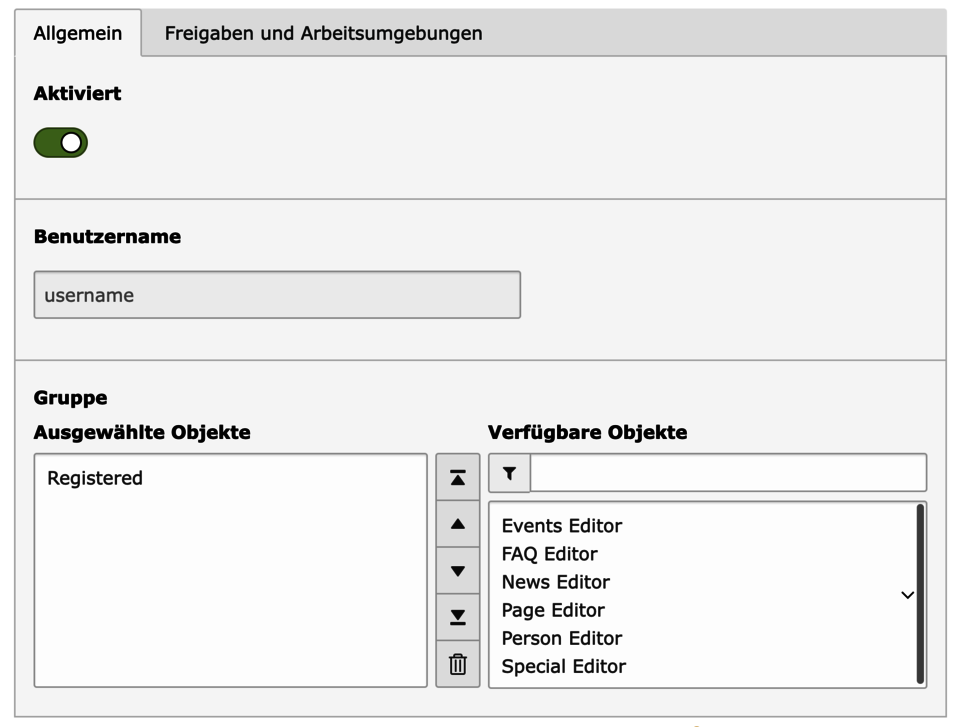
You can also open the user profile to unlock the user. Click on the name or the button edit. Now you can activate the user in the General tab. Select the Enabled checkbox and save the setting.
With these two methods users can also be disabled.
Groups in easyWeb standard
In easyWeb standard, groups are used to grant authorizations. Thus, there is a clear subdivision. The capabilities of individual groups do not overlap in principle. The exception is the Site Admin group.
See the table for detailed information about the groups:
| Group | Permissions |
|---|---|
| Site Admin | Can only be assigned by IT Services (support-its@unibas.ch) and has all permissions. Also has access to the Site Configurator (active languages, maintenance mode, background image, etc.) and User Admin. |
| Page Editor | Can create, edit and delete pages and content in the Page module below the Pages page. |
| Special Editor | Can edit the meta navigation and the links at the bottom of the Special folder. |
| Person Editor | Gets access to all profiles in the Persons folder. Can modify the profiles, edit their subpages and mutate the affiliation to publications and projects. Without this affiliation, this is only possible for the user themself. The Person Editor can also edit the template for the profile page. |
| News Editor | Can create and edit news articles in the News/Events/FAQ module. |
| Events Editor | Can create and edit event posts in the News/Events/FAQ module. |
| FAQ Editor | Can create and edit FAQ entries in the News/Events/FAQ module. |
| Registered | Basically has access to the backend. However, only the user's own profile (incl. subpages) can be edited in the Page module. The user also has access to the File List module and can create, edit and delete files there. |
As you can see in the table, only Site Admin and Page Editor can edit pages and page content in the Page module. This allows to assign precise permissions.
Add users to groups
When you have opened the profile you can add the desired permissions in the General tab. In the Groups section, you can add the groups to the user by left-clicking in the Available objects box on the right.
You can also remove the group membership. To do this, select the group in the Selected Objects box on the left and click on the recycle bin. The object will now be moved to the right box.
Finally, save the settings.
Recommended order
So that the users in the tree structure have, for example, the news and events directly below each other, the roles must be assigned in the correct order. This helps the overview in the backend, but has no direct influence on the frontend.
The recommended order is:
- Page Editor
- News Editor
- Events Editor
- FAQ Editor
- Special Editor
- Person Editor
Authorize users to partial areas
By default, users (within group permissions) have access to all pages and files. You have the option to restrict access so that users can only edit certain pages / sub-pages and files / folders. Follow these instructions if you want to restrict access to files.
If you want to allow a user access to only one or more subpages in the page tree structure, follow these steps:
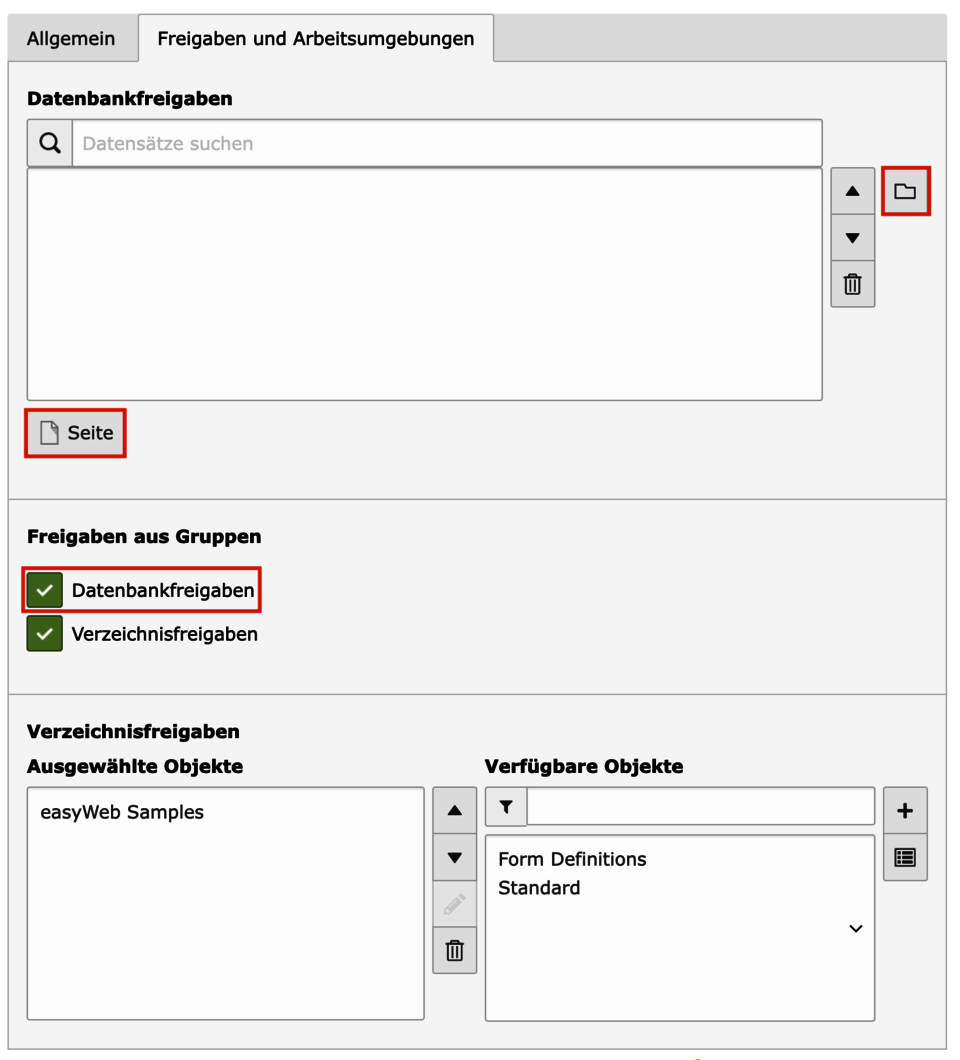
- Switch to the Mounts and Workspaces tab.
- Use the folder icon at the top right to select the sub-areas to which the user should have rights. Add the subareas to the database shares. The sub-areas can also be added using the search function.
- Finally, in the Mounts from groups section, uncheck the Database shares box. Otherwise, the user will remain a page editor of the entire section.
- Save and close.
Remove sections: Select the entry and click on the trash can. Close the adjustment with Save.


